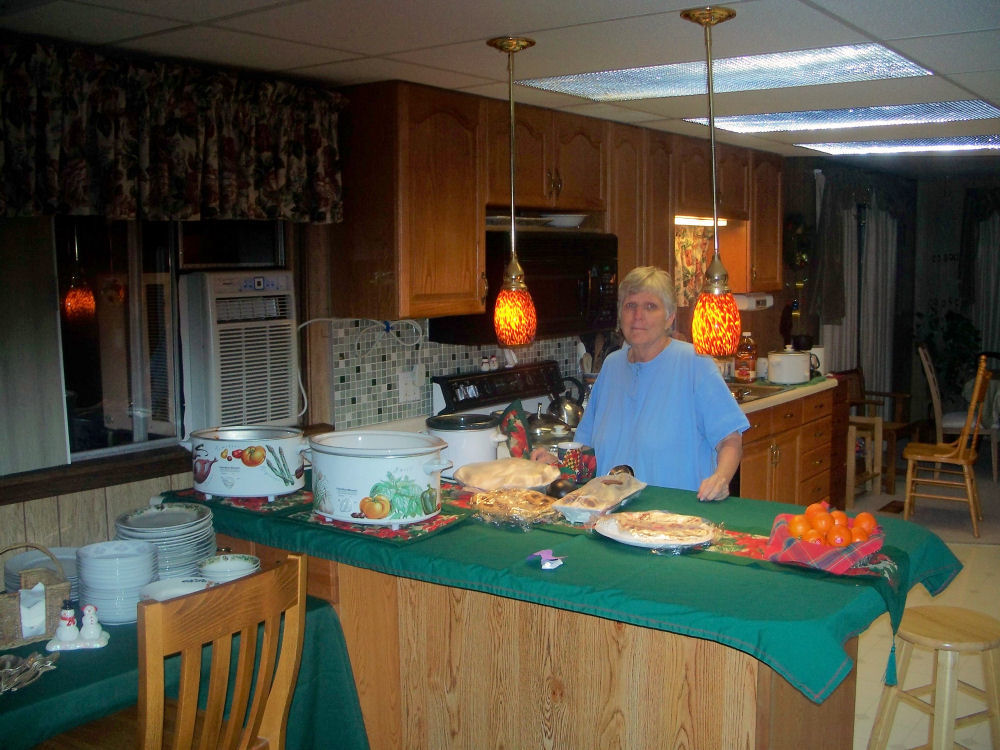
The Bouwman Kitchen on a typical Cookie Day.
I rebuilt this kitchen in 1996, as we moved in.
I rebuilt this kitchen in 1996, as we moved in.
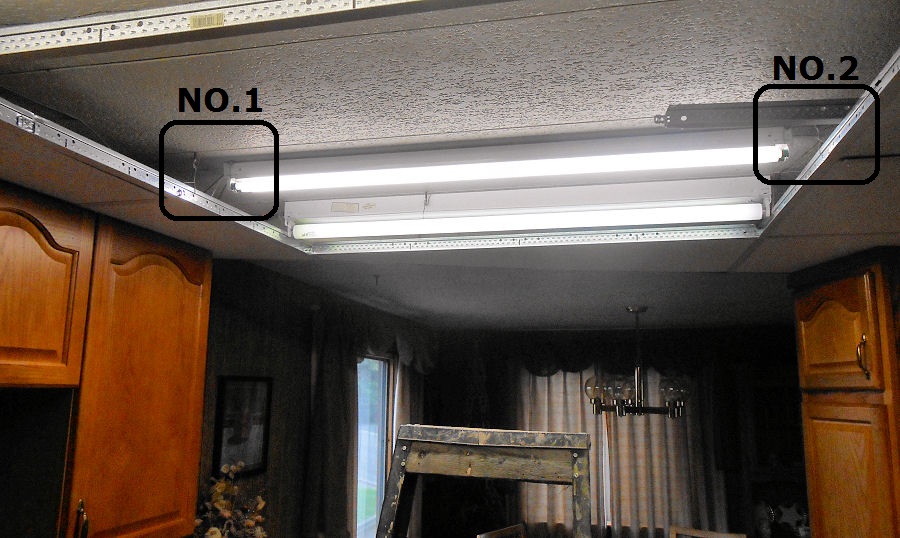
The LIGHTING is in a supported ceiling that fits in the "allowable" space above the cupboards. There is not much room.
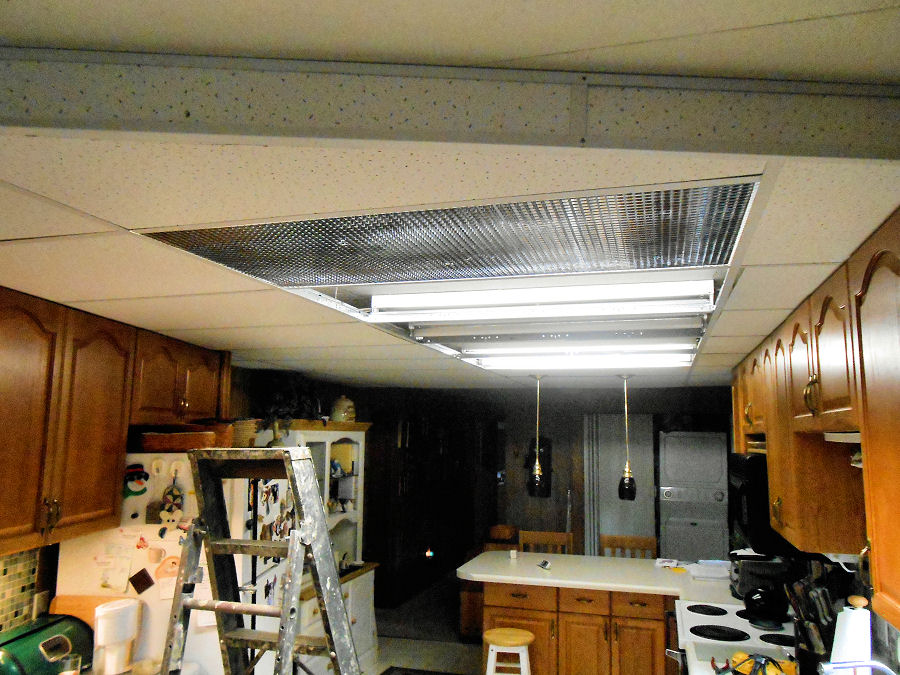
In September of 2013, the ballast in one floresant fixture failed, being in the far set in the above image.
In September of 2013, the ballast in one floresant fixture failed, being in the far set in the above image.

This the scene of the project. My work period extends over many days for two reasons.
1. Having to endure the "SHINGLES", I can only work for one hour; on anything.................
2. My web pages really keep me busy. Every morning I receive reports on tug locations.
The far fixture is the old one, placed in 1996. Holding the fixture in place is support screweye, tight into a wood joist above.
I purchased the new strip, thinking I was buying the same type as the old. Messed up there, didn't read the package.
I had first mounted the new fixture with one inch screws into the old fiber ceiling tile.
That didn't hold well so I manufactured [2] WIRE SUPPORT BRACKETS made of wire.
This wire I have had since I quit telephone company work.
It is LASHING WIRE, used to hold telephone cables to strand stretched between poles.
It is quite high in strength. I have a half roll left.

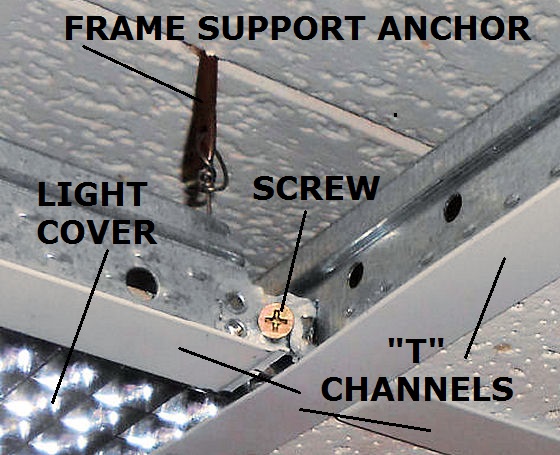
The brackets are place as shown in detail NO.1 below.
"DETAIL KEY"
DETAIL NO.1
It is important that the bulbs, when placed, do NOT touch ANY of the frame work. It is grounded and the bulbs will not light.
I could not place the fixture cover. It just would not snap around the fixture base. So I cut each corner off on an angle, It snapped right in.
The "LOWERED CEILING" support "T" channels are also hung using my LASHING WIRE. :)

DETAIL NO.2
From the start, I had trouble having the "T bars" fitting well around the light fixtures.
I have used extra "SCREWS" pull the bars together. This pulled together after the photo.
From the start, I had trouble having the "T bars" fitting well around the light fixtures.
I have used extra "SCREWS" pull the bars together. This pulled together after the photo.
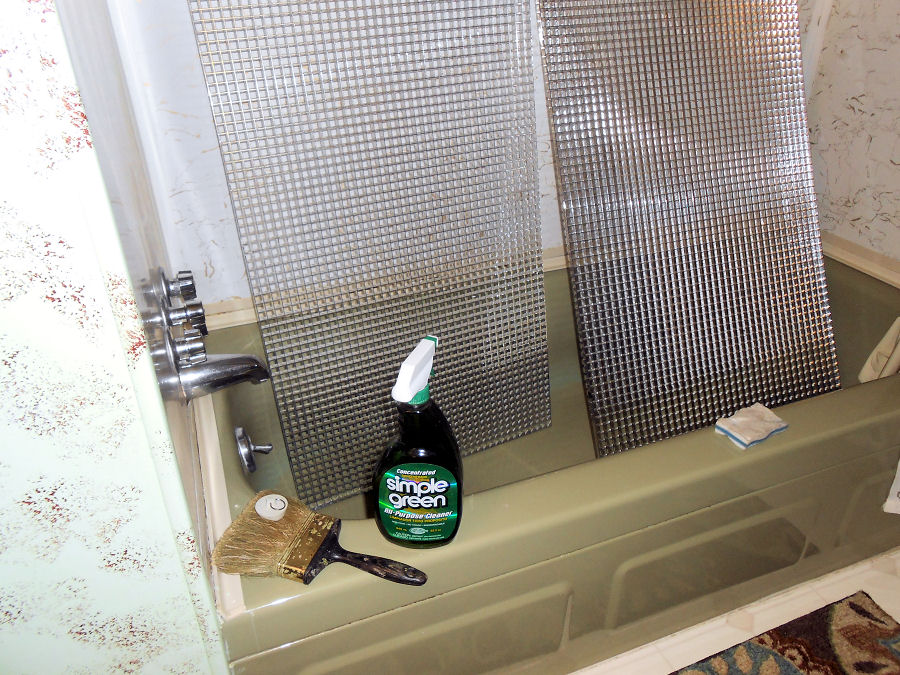
On this day, I still had two LIGHT COVERS to replace. I had just removed them to clean them.
These covers are made of plastic with small mirrored squares. The one over the stove is solid grease.
These covers are made of plastic with small mirrored squares. The one over the stove is solid grease.
The best way to clean these Light Covers is to place them in the bathtub. [Ours is OOOOld].
Have some warm water in the tub. Spray them with Simple Green and
just swerl the paint brush through the squares. Then rinse with spray from shower.
Have some warm water in the tub. Spray them with Simple Green and
just swerl the paint brush through the squares. Then rinse with spray from shower.